
This week, NSA (National Security Agency) all of a sudden made a gift to humanity, opening sources of their software reverse engineering framework. Community of the reverse engineers and security experts with great enthusiasm started to explore the new toy. According to the feedback, it’s really amazing tool, able to compete with existing solutions, such as IDA Pro, R2 and JEB. The tool is called Ghidra and professional resources are full of impressions from researchers. Actually, they had a good reason: not every day government organizations provide access to their internal tools. Myself as a professional reverse engineer and malware analyst couldn’t pass by as well. I decided to spend a weekend or two and get a first impression of the tool. I had played a bit with disassembly and decided to check extensibility of the tool. In this series of articles, I'll explain the development of Ghidra add-on, which loads custom format, used to solve CTF task. As it’s a large framework and I've chosen quite complicated task, I’ll break the article into several parts.
By the end of this part I hope to setup development environment and build minimal module, which will be able to recognize format of the WebAssembly file and will suggest the right disassembler to process it.
Let's start with the task description. Last year security company FireEye hosted CTF contest, named flare-on. During the contest researchers had to solve twelve tasks, related to reverse-engineering. One of the tasks was to research the web-application, built with WebAssembly. It’s relatively new executable format, and as far as I know, there’s no perfect tools to deal with it. During the challenge, I tried several various tools trying to defeat it. Those were simple scripts from github and known decompilers, such as IDA pro and JEB. Surprisingly, I’ve stopped on chrome, which provides pretty good disassembler and debugger for WebAssembly. My goal is to solve the challenge with the ghidra. I’m going to describe the study as fully as possible and give all the possible information to reproduce my steps. Maybe, as a person, who doesn’t have much experience with the instrument, I might go into some unnecessary details, but it is how it is.
The task I’m going to use for study can be download from flareon5 challenge site. There’s file 05_web2point0.7z: archive encrypted with a scary word infected. There are three files in the archive: index.html, main.js and test.wasm. Let’s open the file index.html in a browser and check the result out:

Well, that’s what I’ll work with. Let’s start with html study, especially since it’s the easiest part of the challenge. The html code doesn’t contain anything except loading of main.js script.
<!DOCTYPE html>
    <html>
        <body>
            <span id="container"></span>
            <script src="./main.js"></script>
        </body>
    </html>
The script doesn’t do anything complicated as well, despite it looks a bit more verbose. It just loads file test.wasm and uses it to create WebAssembly instance. Then it reads parameter ”q” from url and passes it to method match, exported by the instance. If string in the parameter is incorrect, script shows the image we’ve seen above, in terms of FireEye developers called “Pile of poo”.
    let b = new Uint8Array(new TextEncoder().encode(getParameterByName("q")));
    let pa = wasm_alloc(instance, 0x200);
    wasm_write(instance, pa, a);
    let pb = wasm_alloc(instance, 0x200);
    wasm_write(instance, pb, b);
    if (instance.exports.Match(pa, a.byteLength, pb, b.byteLength) == 1) {
        // PARTY POPPER
        document.getElementById("container").innerText = "🎉";
    } else {
        // PILE OF POO
        document.getElementById("container").innerText = "ðŸ’";
    }
Solution of the task is to find the value of the parameter q that makes function ”match” return «True». To do this, I'm going to disassembly the file test.wasm and analyze the algorithm of the function Match.
There's no surprises, and I'll try to do it in Ghidra. But first I have to install it. Installation can (and should) be downloaded from https://ghidra-sre.org/. Since it’s written in Java, there’s almost no special requirements to installation, it doesn't required any special efforts to install. Everything you need is to unpack the archive and run the application. The only thing required is to update JDK and JRE to version 11.
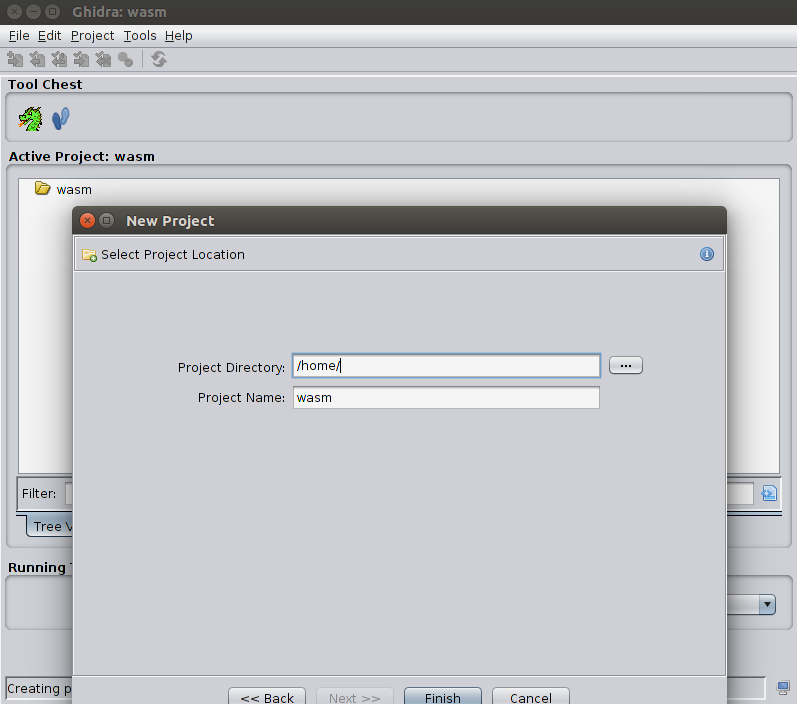
Let’s create new ghidra project (File->New Project), and call it «wasm»/
Then add to project the file test.wasm (File → Import file) and see how ghidra can deal with it
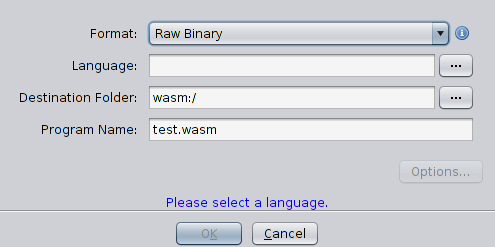
Well, it can do nothing. It doesn’t recognize format and can’t disassembly anything, therefore it’s absolutely powerless to deal with this task. Finally we’ve come to the subject of the article. There's nothing left to do, but write a module, which is able to load wasm file, analyze it and disassembly its code.
First of all I’ve studied all the available documentation. Actually, there’s only one suitabledocument, showing the process of add-ons development: slides GhidraAdvancedDevelopment. I’m going to follow the document, giving blow-by-blow description.
Unfortunately, add-ons development requires usage of eclipse. All my experience with eclipse is the development of two gdx games for Android in 2012. It had been two weeks full of pain and suffering, after which I erased it from my mind. Hope after 7 years of development it’s better than it used to be.
Let’s download and install eclipse from the official site.
Then, install extension for the ghidra development:
Goto eclipse Help → Install New Software menu, click Add button and choose GhidraDev.zip from /Extensions/Eclipse/GhidraDev/. Install it and restart of the extension. The extension, adds templates to the new project menu, allows to debug modules from eclipse and compile module to the distribution package.
As it follows from the developers docs following steps must be done to add module for processing new binary format:
- Create classes, describing data structures
- Develop loader. Loader should be inherited from the class AbstractLibrarySupportLoader. It reads all the necessary data from the file, checks data integrity and converts the binary data to internal representation, preparing it to analysis
- Develop analyzer. Analyzer is inherited from the class AbstractAnalyzer. It takes the data structures prepared by the loader and annotates them (I’m not really sure what does it mean, but I hope to understand during the development)
- Add processor. Ghidra has an abstraction: Processor. It's written in internal declarative language and describes instructions set, memory layout and other architectural features. I’m going to cover this topic, writing the disassembler.
Now, when we have all necessary theory, it’s time to create the module project. Thanks to the previously installed eclipse extension GhidraDev, we have the module template right in the File->New project menu.
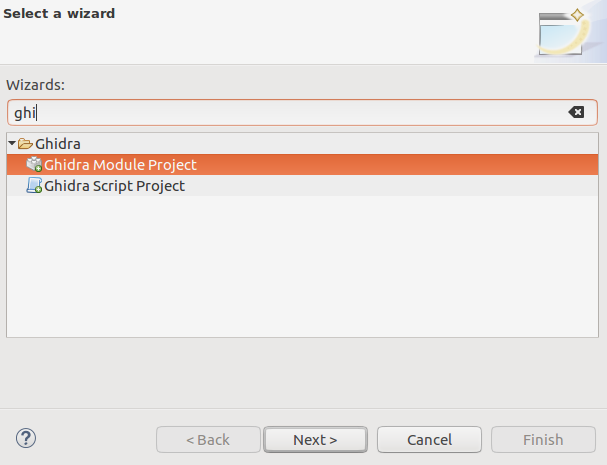
Wizard ask what components are required. As it was described before, we would need two of them: loader and analyzer.
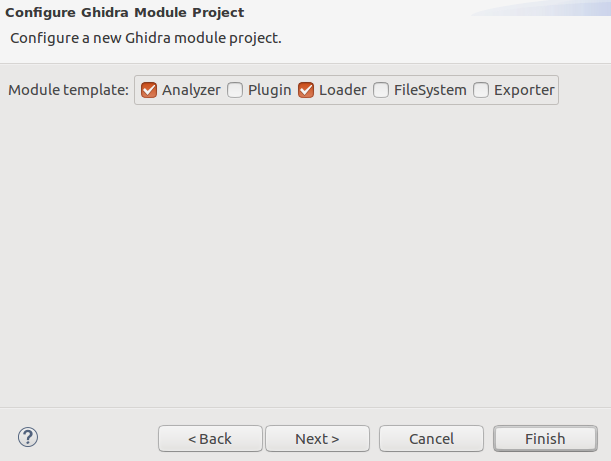
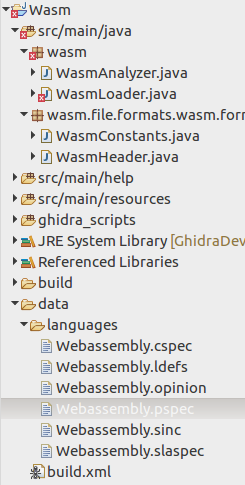
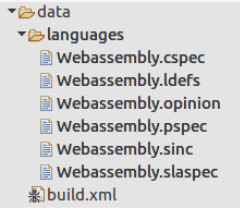
Wizard creates project skeleton with all the necessary parts: blank analyzer in the file WasmAnalyzer.java, blank loader in file WasmLoader.java and language skeleton in directory /data/languages.
Let’s start with the loader. As it was mentioned, it should be inherited from the class AbstractLibrarySupportLoader and has three methods to be overloaded:
- getName — this method should internal name of the loader. Ghidra uses it in various places, for example, to bind loader to processor
- findSupportedLoadSpecs — callback, executed, when user chosen file to import. In this callback loader should decide whether it able to process the file and return instance of the class LoadSpec, telling user how file can be processed
- load — callback, executed, after user loaded file. In this method loader parses file structure and loads into ghidra. Will describe it in more details in next article
The first and the simpliest method is getName, it just returns the name of the loader
    public String getName() {
         return "WebAssembly";
    }
Second method to implement is findSupportedLoadSpecs. It’s called by tool during the import of the file and should verify whether loader is able to process the file. If it’s able method returns object of the LoadSpec class, telling what object is used to load file and what processor will disassembly it's code.
Method starts from the format verification. As it follows from the spec, the first eight bytes of the wasm file should be signature “\0asm” and version.
To parse the header, I created class WasmHeader, implementing interface StructConverter, which is base interface to describe structured data. Constructor of the WasmHeader receives the object BinaryReader — abstraction, used to read data from binary source being analyzed. Constructor uses it to read header of the input file
   private byte[] magic;
   private byte [] version;
   public WasmHeader(BinaryReader reader) throws IOException {
        magic = reader.readNextByteArray(WASM_MAGIC_BASE.length());
        version = reader.readNextByteArray(WASM_VERSION_LENGTH);
   }
Loader uses this object to verify signature of the file. Then, in case of success, searches for the appropriate processor. It calls method query of the class QueryOpinionService, and passes it the name of the loader (“Webassembly”). OpinionService is looking for processor associated with this loader and returns it back.
List<QueryResult> queries = QueryOpinionService.query(getName(), MACHINE, null);
Sure thing it returns nothing, because ghidra doesn’t know processor, called WebAssembly and it's need to define it. As I told before, wizard created the language skeleton in directory data/languages.
At the current stage there are two files which might be interesting: Webassembly.opinion and Wbassembly.ldefs. File .opinon sets the correspondence between loader and processor.
<opinions>
    <constraint loader="WebAssembly" compilerSpecID="default">
        <constraint primary="1" processor="Webassembly" size="16" />
    </constraint>
</opinions>
It contains simple xml with few attributes. It’s need to set name of the loader in to attribute “loader” and name of the processor into attribute “processor”, both are “Webassembly”. On this step I'll fill other parameters with the random values. As soon as I know more about Webassembly processor architectoure, I'll change them to correct values.
File .ldefs describes features of the processor, which should execute code from the file.
<language_definitions>
   <language processor="Webassembly"
            endian="little"
            size="16"
            variant="default"
            version="1.0"
            slafile="Webassembly.sla"
            processorspec="Webassembly.pspec"
            id="wasm:LE:16:default">
    <description>Webassembly Language Module</description>
    <compiler name="default" spec="Webassembly.cspec" id="default"/>
  </language>
</language_definitions>
Attribute “processor” should be the same as the attribute processor from file .opinion. Let’s leave other fields untouched. But remember next time that it’s possible to set registry bittness (attribute «size»), file describing architecture of the processor «processorspec» and file, containing description of the code in special declarative language «slafile». It’ll come handy to work on disassembly.
Now, it’s time to get back to the loader and return specification of the loader.
Everything’s ready for the test run. Plugin for GhidraDev has added run option “Run → Run As → Ghidra” to eclipse:
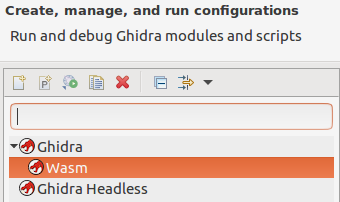
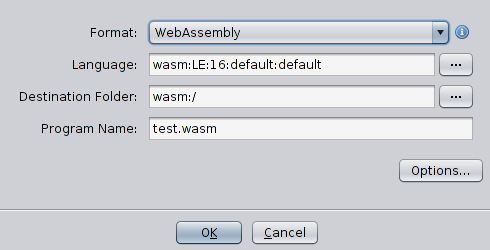
It runs ghidra in debug mode and deploys there module, giving a great opportunity to work with the tool and in the same time use debugger to fix errors in the module being developed. But at this simple stage there is no reason to use a debugger. As before, I’ll create new project, import file and see whether my efforts paid off. Unlike the last time, the file is recognized as WebAssembly, and loader proposes corresponding processor for it. That means everything works, and my module is able to recognize format.
In the next article I’ll extend loader, and make it not only recognize, but also describe the structure of the wasm file. I think at this stage, after environment is set up, it will be easy to do.
Code of the module is available at github repository.
